The development of a Dry Garden

general plan dry garden

general plan dry garden

Six years ago the idea for a Dry Garden was launched for a piece of bare land with a surface of approx. 1500 square metres. It was the most brackish part of our 10 hectare (25 acres) property and soil analysis in The Netherlands showed a pH of 8.3 and an organic content of 3 percent next to numerous deficits of nitrogen, phosphorous and diverse trace elements. We choose for the organic and slow way in improving the soil by deminishing the brack and bringing the pH down to 6.8 by adding coarse river sand and plenty of compost in the top 50 cm of the existing (too clayish) soil. After that we soaked everything a few times to get the brack level down (<40ppm; was 200 ppm). And than again mixing compost and gritsand through the top 30 cm of the soil. Considering that it takes approx. 3 years before the new soil (micro-organisms, etc.) is established we waited that long before we made the first trials with some cacti, other succulents and some acacia species including acacia hybrids.
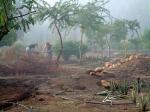
preparation works

preparation works

This year we made the final decision and two students (Pauline Gillet and Sybille de Cussy) from the landscape university in Blois, France (ENSNP) have been fully engaged in designing the garden and implementing their design in practice.

De Cussy and Gillet knew literally nothing about succulent plants and lack of knowledge often results in an unusual surprising approach.

artist impression of aloe bush

artist impression of aloe bush

They created a dry garden with 7 spheres (totalling 78 different species, subspecies, etc.); creeping plants, shrubs/trees, rocks, cactus and euphorbia bushes, aloe bush, mixed border, agaves.

rock art in the dry garden

rock art in the dry garden

Students of the McGregor Waldorf School were engaged in rock art  drawings throughout the garden as part of Land Art Project in South Africa that is initiated by Soekershof.

detail of aloe bush

detail of aloe bush

A PDF-file with plan and plantlist is -free of charge- available for interested landscapers and other interested parties with simular soil ‘problems’. Request e-mail to info -at- soekershof.co.za
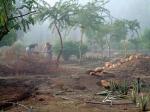
Basic Soil preparation

This post is “Under continious Construction”.

In the past we have mentioned a few times ‘soil’ and ‘soil preparation’. See here, there and there.

Every nursery has its own recipes and one may assume that these all work.

In addition to the info provided via the links above:

Succulent plants thrive in a wide range of soils each with their own characteristics. An Aloe plicatillus originate from acid soil (pH <6) near Franschoek in South Africa and and the Gunniopsis glabra originate from a saline flood plain (pH >7.5) in Western Australia.

These differences don’t necessarily mean that these plants don’t grown in different environments.

A good (general) pH of the soil is just below neutral (=pH 7); pH  6.8 is recommended. Soil analysis in the Western Cape is done by Bemlab in Somerset West Do It Yourself pH-meters are not always accurate.

An interesting article about pH is this one. With thanks to Ralph Martin of the south Wales branche of the British Cacti ad succulent Society.

The most important characteristic of the soil is drainage. Especially the top soil must drain freely an excess of water to avoid ‘neck rot’ and also (high temperatures after rainfall) mealy bugs. Ideal is a free draining top layer (10-20cm) of coarse sand or gravel rich soil and a sublayer (10-20 cm) which can accumulate a little bit of water. The characteristics of the sub soil (>30 cm) should be more or less simular to that of the sublayer of the topsoil and is important for deep rooting plants like collumnar cacti. Soil (top- and subsoil alike) may never be waterlogged.

Preferable poor soil (low organic content) but some compost (preferable of horse manure or composted mushroom medium) in sublayer and subsoil is recommended. In some part of South Africa (for example those with brackish/saline soil) an small dose of bonemeal can improve the soil.  Fertilisers (even dried chicken manure or ‘bounce back’)  improve plant growth but also make the plants extra vunerable for pests and diseases.

No-till

In large scale agricultural operations there is an increasing amount of farmers that implements ‘no-till’ in the cultivation of their crops thus as less as possible disturbing the soil.

Quote from WikipediaIn no-till farming the soil is left intact and crop residue is left on the field. Therefore, soil layers, and in turn soil biota, are conserved in their natural state. No-tilled fields often have more beneficial insects and annelids[12], a higher microbial content, and a greater amount of soil organic material. Since there is no plowing there is less airborne dust.

No-till increases the amount and variety of wildlife.  This is the result of the improved cover because of surface residue and because the field is disturbed less often than conventional fields.

If you know that your soil is suitable don’t dig. drygardenpreparationworks1Preparation limits itself than only to weeding, cleaning and planting unless you planned to make (small) rockery heeps, etc.  (see picture).

bone meal and sea weed

Towards the end of the South African winter it’s not a bad idea to provide the Spring growth of plants with an organic ‘headstart’.

In Wikipedia you can find a few articles about organic soil improvers.

Look under bone meal and sea weed. Both stimulate the root growth. Good healty roots are the foundation for a healthy growth of the plant.

What’s not mentioned in Wikipedia is the use of composted horse manure; also rich is phosporous like bone meal but not the risk of contamination with lead and so on as some bone meal products.

Sea weed is available in South African shops as SeaGro and in large quatities at agricultural suppliers as Kelpak. It’s a true South African product (Made in Simonstown). Just spray it on plants and soil at the end of August and once more in mid-October. Bone meal: a little hand full around every plant and slightly cultivate it in the soil. Only once a year around this time. And don’t believe what the manufacturor writes on the package (“every six weeks”). Plants can get killed due to an overload.

Composted horse manure: Spread  between the plants and with a bit of cultivating mix it with the top soil. Here we are glad with a horse keeping neighbour. Thoroughbreed horses with honest natural food without hormones and other ‘boasters’.

One golden rule: Too much is too much. Relativily small quantities are the best. Don’t make it too easy for plants (they get vunerable for diseases and pests). Life is hard; should also be for plants. That makes them strong.

Keep on talking with your plants.